Hi all,
Thank you for reading my blog. I hope you are all keeping well and occupied during the continuing time of restriction. It is coming up for three months here in the UK since lockdown was imposed, and though we are starting to get out more there are still difficulties to be faced. I hope that sewing has been for you, as for me, a way of keeping busy and creative over the past weeks.
The days have passed surprisingly quickly for me, despite only going out once a week to the supermarket. I have done a lot of gardening, and much cooking for my family who are all WFH. However I have finally managed to find time to post about two quilts which were actually finished shortly after my last post. As usual real life got in the way and derailed my blogging good intentions...
First up is Christopher's quilt: I just had the binding to handstitch when I blogged about it last (here). Apologies for the slight colour differences in the photos - the weather has been so wonderfully sunny recently it has been tricky to choose the best time to take pictures, and some have a slightly yellow cast.

Here's the whole quilt hanging on the washing line. It measures 52" x 64". The design is a Double Four-patch and I used the leftover large squares for a simple outer border.


The larger squares finish at 3" and the small ones 1 1/2", so the finished blocks measure 6". The 63 blocks are set 7 x 9, light and dark blocks alternating so that chains of small light or dark squares cross the quilt diagonally.

You may be able to see on the closeup above that I tried to emphasise this criss-cross effect of the chains of small squares by the diagonal quilting which, because of the different sizes of squares, is an irregular grid. This may be more apparent on the back, below.

I was able to make up a scrappy back from a bundle of half metres of soft grey/cream plaid fabrics in my stash, not bought with any particular project in mind but because I loved them. And the binding fabric which is a blue-brown plaid was left over from backing another quilt. Very satisfying to find and use up fabric when access to quilt shops is impossible. Plus an excuse to re-stock in due course!

Christopher was very grumpy about modelling his quilt, but less grumpy about taking delivery. It is soft and snuggly but sufficiently masculine to be acceptable, and I think he enjoyed being involved in the cutting out and subsequent design decisions. Maybe next time I will get him doing some of the sewing...

You can see the simple cross-hatching in the outer border in the photos above and below. I left the striped inner border unquilted.

At the same time as I quilted the Double Four-patch I tackled the quilting of a long outstanding WIP. I decided that, as I was set up on my big machine with the walking foot and cream quilting thread, I should seize the moment and just get on with it. In the end, the quilting didn't take very long and, as usual, I kicked myself for having left projects languishing when only a few more hours would have finished them. I hope one day to have truly learned that lesson and be more of a finisher than a starter....

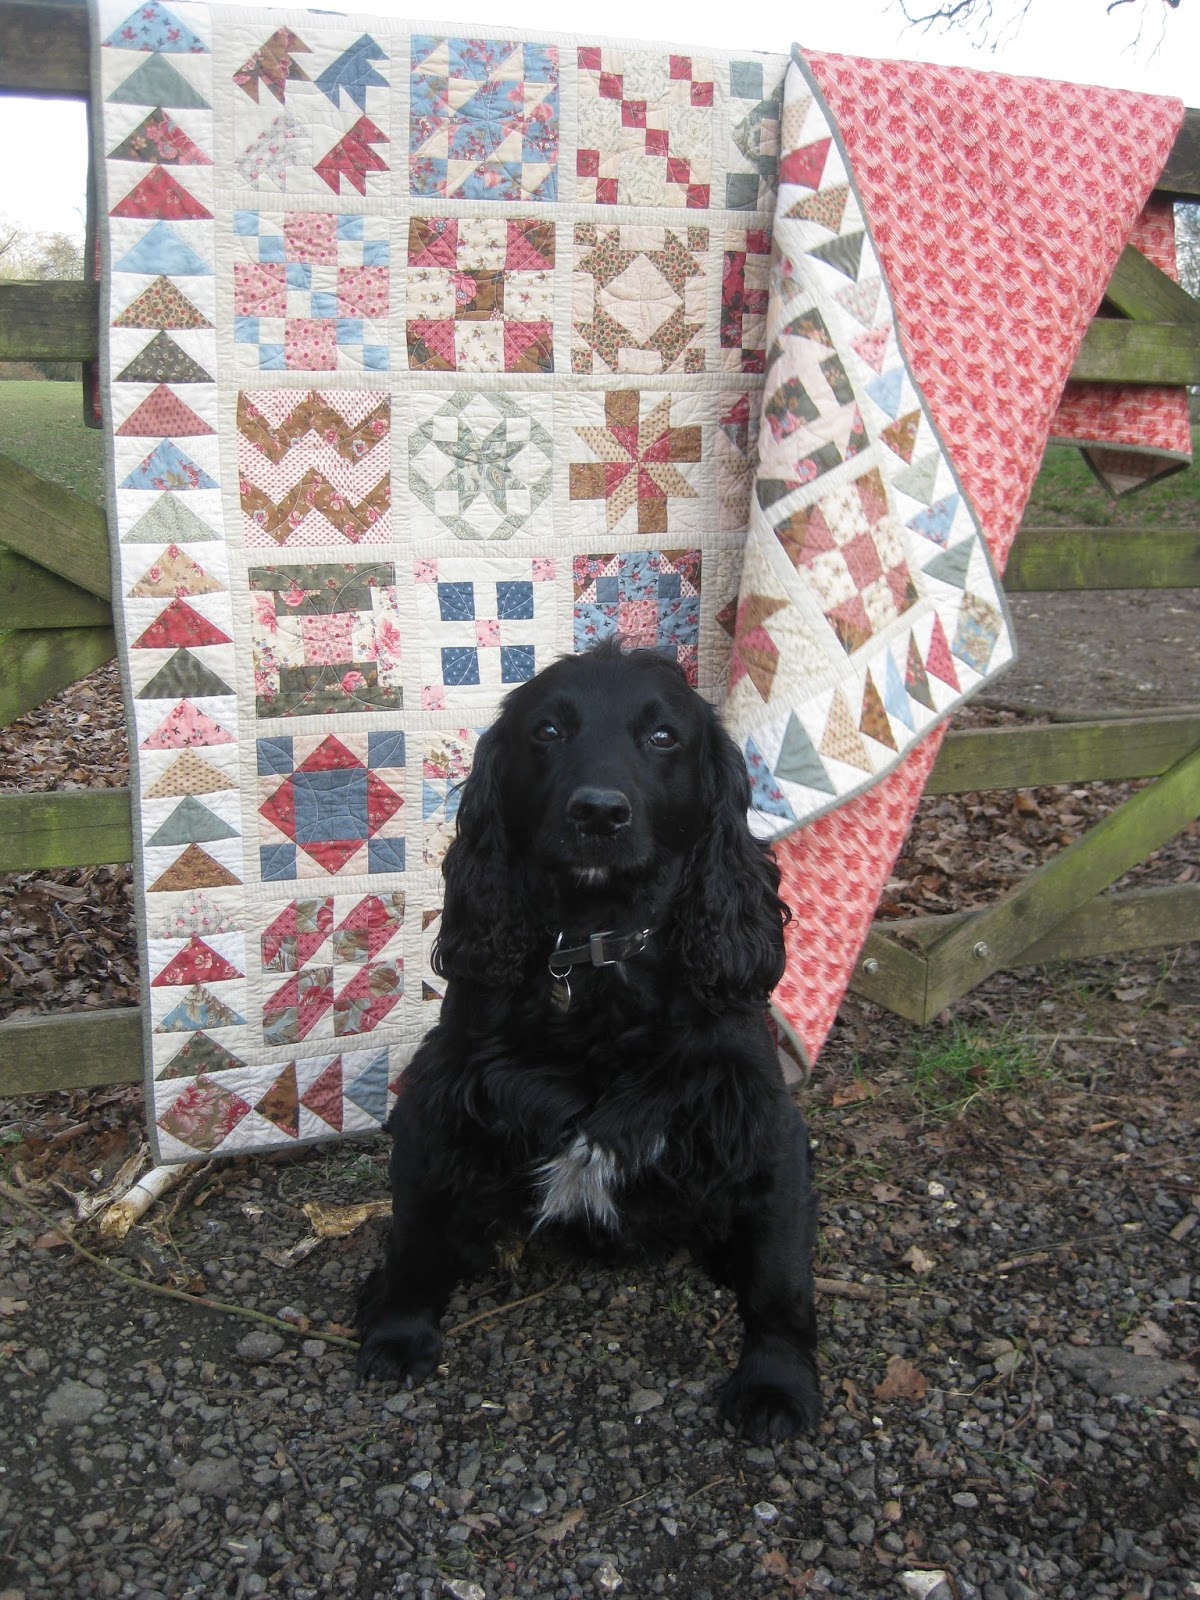
This little quilt dates back to this post here in September 2015! It is from one of Edyta Sitar's books and you will see from the post that I had decided to use some of the HSTs I had been accumulating. As you know, I adore piecing, but I always seem to get stuck on the quilting, which is why I have an embarrassing number of tops waiting to become finished quilts.

The quilt measures a smidge under 32" square. There are 144 x 2" (finished size) HSTs set 12 x 12 not counting the 12 blue ones in the centre star. The floral border measures 4" finished. I made all the HSTs using papers for accuracy: a great way of using up scraps from other projects. I collected them in a box and when the box was getting full, I made this quilt. My aim is one day to make an enormous HST quilt in the style of the old Dutch quilts which I love. You can see some modern versions of the sort of thing I mean in the latter part of this post (from a display at Cowslip Workshops in 2017, and no, I haven't finished my Irene Blanck quilt either...).

Originally I had intended to free-motion machine quilt a flowing floral design; in the intervening years since completing the top I have still not learned to FMQ well, so I decided that finished was better than perfect and I would go with straight line quilting in the tradition of utility rather than high art!

Quilting across the HSTs I find easier than stitching in the ditch, and I like the extra texture you get when the quilting thread isn't hidden. And creating a secondary design: can you see the pinwheel framed by the quilting lines?

In the floral border I quilted a simple leaf design with my walking foot. The curves are very gentle so it was straightforward. I started with the zigzag line which forms the leaf spines, and then added the curves in a couple of continuous lines, rather than quilting each leaf individually. This helps to give the process more flow and reduces the number of stops and starts with ends to be tied in.

Binding is from stash, an off-raspberry small floral tone-on-tone: not what I had in mind when I pieced the top but it feels right now. I love that the decisions involved in making a quilt don't all have to be made at the beginning of the project, but can evolve. Sometimes I feel a quilt needs to be left in a dark corner to mature: really I think it is me who has to mature, while the quilt waits patiently for me to have acquired the skill or judgment necessary to complete it.

Since finishing these quilts I have been busy stitching my Arlington Square blocks together by hand and chainpiecing on the machine another quilt using a pattern by Emma Mary Designs in a similar bright palette. But you will have to wait to see those next time. Meanwhile I hope you make good progress with whatever you are working on.