Friday, 14 August 2020

Belated July roundup: two finishes


Another month gone and time to catch up again.  I hope you have stayed well at this time and have managed to sew a little.  Sewing has been a rare but real treat for me as I have been swamped by admin for local issues.  I have valued being able to escape the computer keyboard, even if just for short periods of time, to use my hands for something other than typing.
So the two completed projects featured here are not recent fixes, but have been waiting patiently their turn in the spotlight since early July.  I have done a little more sewing since then to tackle the WIPs so hope to write a follow up post before August is out.  Then, who knows, September might be a new start: despite my kids being all grown up, September always feels to me like the start of the year, with summer hols behind us and a fair time before Christmas, I can really get stuck in.  That's the hope anyway...

So let's get on with the roundup: first is a cushion with a foundation pieced Dachshund with a flyaway felt ear (lovely to stroke, just as one absent-mindedly would stroke a real dog's ear when he is snuggled by you on the sofa...(apologies to all cat lovers out there, just substitute you favourite animal in the mental picture of comfort and relaxation).


I cannot claim any credit for the pattern which was designed bu Jo Carter and featured in Love Patchwork & Quilting Issue 52 (a while ago now, sorry).  I put the magazine aside as I wanted to work on a project with my young friends which was a more complex foundation pattern than the Circle of Flying Geese they made a while ago [stop press: I have finally finished mine and and made the tops into cushions, to be posted next time]..  

Needless to say, having pulled the fabric from my stash, it sat around for some time.  Lockdown made me get on with it.  I am not the greatest fan of foundation piecing but it definitely has its uses in this sort of project.  The design was actually for a pair of dogs on a wallhanging, but I thought one dog would be just right the right size for a cushion.


I finished the cushion back with a concealed zip, using this excellent tutorial by Sotak Handmade.  I even made the cushion pad, as the cushion is an unusual size: 12" x 18 1/2".  I recommend using featherproof ticking, not ordinary calico which is a looser weave, if you are going to make your own cushion pads; french seams will also help ensure the feathers are less likely to escape over time.  The feathers came from an old feather duvet.  It is a messy job filling the cushion pad, but very satisfying to have made it from what I had in the house and to find a new use for the duvet's contents.  Done!


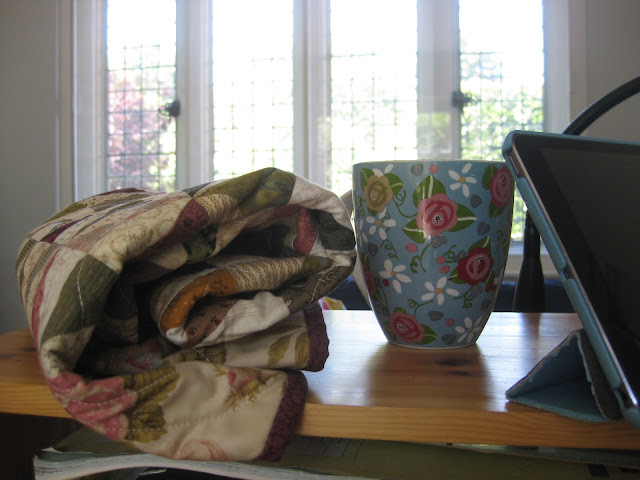
My second finish is this small green floral quilt, made with mostly Japanese fabrics by Lecien.  I am ashamed to say that the completed top has been waiting almost twenty years to be quilted.  The folded backing had slightly faded, but hopefully only I will notice.


I bought all the fabrics many years ago when I worked in my LQS and lush Japanese floral fabrics were first becoming available in the UK.  The pattern is a simple one to make, composed of strips and squares, but in a blended, blurred style with the lovely fabrics doing most of the work: I was inspired by the book, Blended Quilts by Marsha McCloskey and Sharon Yenter which came out in 2002 which is full of glorious quilts using marvellous complex florals and reproduction fabrics.


The top didn't take long to make: why then so long to complete the quilt?  The sticking pint, as so often the case for me, was how to quilt it.  I had this great plan to hand quilt Amish Waves/Baptist Fans all over, but my handquilting isn't great and so I kept putting it off.  During lockdown I dug out a huge pile of unquilted tops, and have has to recognise that I will never be able to complete them if I go down the handquilting route.


Finished is always better than perfect, so my aim over the remainder of this year is to tackle and finish all completed quilt tops for which I already have backing fabrics set aside.  This top, being fairly small, was the prime candidate, so I layered it up and pondered the quilting: the large squares lend themselves to a curving design, so I went with a favourite quatrefoil leaf shape which is easy to fit to the size of the square.  You will see that I made a template out of template plastic and marked the design with a Hera marker, the lines showing up clearly on this fabric.


The complementary strip squares I quilted with diagonals, but I felt I didn't want a regular cross-hatch.  The elongated diagonal crosses seem more elegant and in keeping with the spirit of the quilt.  There were a reasonable number of ends to tie in with this quilting pattern, but it was worth it and I am very pleased with the result.


Here's the back to show the quilting.  You can just see the fading where the backing had been folded, but it sort of looks vintage, or so I tell myself.  Lesson to self about not keeping fabrics where the sun might get at them...and maybe using stash a bit quicker?


The quilt measures 45" x 58".  The large squares measure 6" finished (cut 6 1/2") and the strips 11/2" finished (cut 2").  There are half blocks around the edges and a 4 1/2" (finished size) border of the feature fabric, the green floral, to frame the quilt and link with the large squares.


These photos were taken in July before the fierce sunshine we have had recently, so the garden is looking quite green still.  The metallic blue of the globe thistles in the foreground of the photos below bring out the grey-blue tones in the quilt (serendipity as I didn't plan it like that).  I am not a fan of green quilts usually, but I do love this one: with such a soft palette it is easy on the eye.


No time to sit and relax in the sunshine - on with the next projects, there are plenty to choose from!  Hope you have some time for sewing - or sitting in the sun, as takes your fancy!

Thursday, 9 July 2020

All things bright and beautiful


Here are two finished tops which I thought might deserve the title of this post, and which might also cheer up the grey drizzle we are 'enjoying' here this week.  Good for the garden but a far cry from the melting temperatures of a couple of weeks ago.


So, the keen-eyed among you many already have spotted the link between the two tops: they are both made from patterns by Emma Newman of Emma Mary Designs. The first photo is of Arlington Square which I started last August at a class with Emma, who was then visiting Pincushion in Tunbridge Wells from her home in Australia (see this blogpost and this one too).  Doesn't the thought of travelling from somewhere so far away seem odd now, after more than three months of lockdown and current travel restrictions?

While I was there I bought another of Emma's patterns, Kaleidoscope, and this is the top featured second above and again below, showing all the seams and looking a bit like stained glass with the light shining through:


One quilt top is machine pieced, the other entirely hand pieced. But the other link between them is that the two quilts use the same fabrics.  That is because I cut the all the pieces at the same time from a selection of bright fat quarters from my stash.  


Some of the fabrics had been 'resting' in the stash for quite a long time, others were more recent acquisitions.  The only fabrics specifically bought for these projects were the grey and white stripe for handpieced Arlington Square, and the off-white plain and the soft grey Tilda spot for  Kaleidoscope.  In both cases that was because I needed quite a bit of yardage to keep those elements of the two designs constant.


The machine pieced quilt was easy to rotary cut in the usual way, so I layered up the fabrics, and cut strips into squares and triangles in the way we are all familiar with.  I put these large pieces for the Kaleidoscope top in a box and put them on one side.  


Once I was well into Arlington Square and enjoying the brighter palette, I decide to do some machine piecing by way of a change - nothing like starting a new project while still in the middle of an old one (I don't expect any of you have done that...).  I was able to chain piece the blocks in no time once I had sorted out a pressing plan so the seams would nest together.  


The cutting was quite time consuming but the variety of colourful fabrics helped to keep me interested.  For the handpieced quilt I bought the laser cut plastic templates specially designed for the quilt.  This does add to the expense of making a hand pieced quilt such as Arlington Square, but it really helps with accuracy, not only for cutting the irregular pieces but also for marking the start and stop points on each piece and the seam allowances. 


I had been sewing away at both over a period of months in the earlier part of this year.  It was nice to alternate machine sewing with hand piecing - a change is as good as a rest, they say!  The tops were put together in the early part of June.  


Both were a bit of a challenge in the final stages: Kaleidoscope had to be laid out in quarters and care taken to rotate and orient the units correctly to keep the design right  There are two different units, 200 of each, and I wanted to try and spread the colours and fabrics fairly evenly through the top so I needed quite a lot of space.


Arlington Square has the blocks set on point so some of the rows were very short and some very long.  I had to lay all the blocks out on my bed to try and get a good distribution of colour and pattern, plus the added complication of the half- and quarter- blocks to complete the design.  I haven't yet trimmed the surplus fabric along the edges as I probably won't be quilting this top for a little while.


So the jury is still out over which of these two tops I love the best.  Kaleidoscope has a freshness but Arlington Square has a saturation of colour which is also very pleasing.  Plus I am so proud to have handpieced (and finished) an entire quilt top!


Maybe I will know who my favourite is once the tops are quilted. The quilting often brings a different dynamic.  We shall see... Meanwhile here are some photos of Kaleidoscope blowing in the wind to finish off this post.  Have a lovely weekend, wherever you are.


Sunday, 14 June 2020

Two finishes: Double Four-patch quilt and HST Doll Quilt


Hi all,
Thank you for reading my blog.  I hope you are all keeping well and occupied during the continuing time of restriction.  It is coming up for three months here in the UK since lockdown was imposed, and though we are starting to get out more there are still difficulties to be faced.  I hope that sewing has been for you, as for me, a way of keeping busy and creative over the past weeks.

The days have passed surprisingly quickly for me, despite only going out once a week to the supermarket.  I have done a lot of gardening, and much cooking for my family who are all WFH.  However I have finally managed to find time to post about two quilts which were actually finished shortly after my last post.  As usual real life got in the way and derailed my blogging good intentions... 

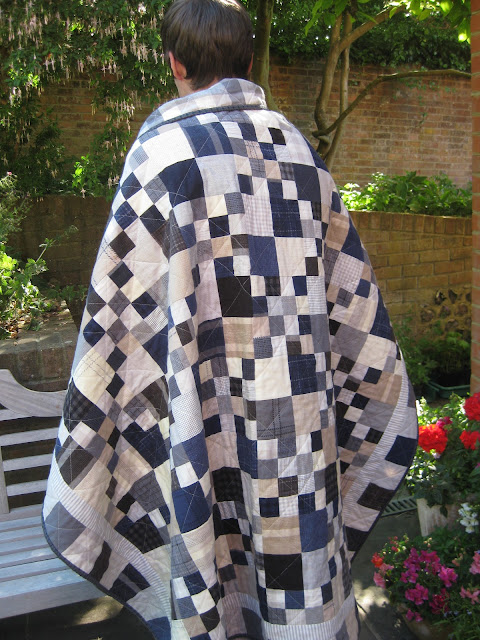
First up is Christopher's quilt:  I just had the binding to handstitch when I blogged about it last (here).  Apologies for the slight colour differences in the photos - the weather has been so wonderfully sunny recently it has been tricky to choose the best time to take pictures, and some have a slightly yellow cast.


Here's the whole quilt hanging on the washing line.  It measures 52" x 64".  The design is a Double Four-patch and I used the leftover large squares for a simple outer border.


The larger squares finish at 3" and the small ones 1 1/2", so the finished blocks measure 6". The 63 blocks are set 7 x 9, light and dark blocks alternating so that chains of small light or dark squares cross the quilt diagonally.


You may be able to see on the closeup above that I tried to emphasise this criss-cross effect of the chains of small squares by the diagonal quilting which, because of the different sizes of squares, is an irregular grid.  This may be more apparent on the back, below.


I was able to make up a scrappy back from a bundle of half metres of soft grey/cream plaid fabrics in my stash, not bought with any particular project in mind but because I loved them. And the binding fabric which is a blue-brown plaid was left over from backing another quilt.  Very satisfying to find and use up fabric when access to quilt shops is impossible.  Plus an excuse to re-stock in due course!


Christopher was very grumpy about modelling his quilt, but less grumpy about taking delivery.  It is soft and snuggly but sufficiently masculine to be acceptable, and I think he enjoyed being involved in the cutting out and subsequent design decisions.  Maybe next time I will get him doing some of the sewing...


You can see the simple cross-hatching in the outer border in the photos above and below.  I left the striped inner border unquilted.


At the same time as I quilted the Double Four-patch I tackled the quilting of a long outstanding WIP.  I decided that, as I was set up on my big machine with the walking foot and cream quilting thread, I should seize the moment and just get on with it.  In the end,  the quilting didn't take very long and, as usual, I kicked myself for having left projects languishing when only a few more hours would have finished them. I hope one day to have truly learned that lesson and be more of a finisher than a starter....


This little quilt dates back to this post here in September 2015!  It is from one of Edyta Sitar's books and you will see from the post that I had decided to use some of the HSTs I had been accumulating.  As you know, I adore piecing, but I always seem to get stuck on the quilting, which is why I have an embarrassing number of tops waiting to become finished quilts.


The quilt measures a smidge under 32" square. There are 144 x 2" (finished size) HSTs set 12 x 12 not counting the 12 blue ones in the centre star.  The floral border measures 4" finished. I made all the HSTs using papers for accuracy: a great way of using up scraps from other projects.  I collected them in a box and when the box was getting full, I made this quilt. My aim is one day to make an enormous HST quilt in the style of the old Dutch quilts which I love.  You can see some modern versions of the sort of thing I mean in the latter part of this post (from a display at Cowslip Workshops in 2017, and no, I haven't finished my Irene Blanck quilt either...).


Originally I had intended to free-motion machine quilt a flowing floral design; in the intervening years since completing the top I have still not learned to FMQ well, so I decided that finished was better than perfect and I would go with straight line quilting in the tradition of utility rather than high art!


Quilting across the HSTs I find easier than stitching in the ditch, and I like the extra texture you get when the quilting thread isn't hidden. And creating a secondary design: can you see the pinwheel framed by the quilting lines?


In the floral border I quilted a simple leaf design with my walking foot.  The curves are very gentle so it was straightforward.  I started with the zigzag line which forms the leaf spines, and then added the curves in a couple of continuous lines, rather than quilting each leaf individually.  This helps to give the process more flow and reduces the number of stops and starts with ends to be tied in.


Binding is from stash, an off-raspberry small floral tone-on-tone: not what I had in mind when I pieced the top but it feels right now.  I love that the decisions involved in making a quilt don't all have to be made at the beginning of the project, but can evolve.  Sometimes I feel a quilt needs to be left in a dark corner to mature: really I think it is me who has to mature, while the quilt waits patiently for me to have acquired the skill or judgment necessary to complete it.


Since finishing these quilts I have been busy stitching my Arlington Square blocks together by hand and chainpiecing on the machine another quilt using a pattern by Emma Mary Designs in a similar bright palette.  But you will have to wait to see those next time.  Meanwhile I hope you make good progress with whatever you are working on.

Thursday, 21 May 2020

Christopher's quilt and update


Hi everyone,
I hope you are all keeping well.  Nearly another month seems to have passed since I last blogged: not quite sure where the time has gone.  

Not going out, the days blur, like the summer holidays when I was a child and had no idea of the date or how long the holidays still had to go.  The weather here has been glorious, also reminiscent of the summer days of the past with clear blue skies and sunshine day after day.  And it is still only May!  

The garden is powering on and we have roses blooming everywhere.  No forecast of rain for the foreseeable so goodness knows how the plants will survive through the summer months proper.

I have managed to do quite a lot of sewing amongst the usual domestic activities.  Here is a quick roundup:


I helped with a project locally, organised by a terrific sewing teacher, Tracey, to make scrubs for the local hospitals and other health professionals.  Tracey did all the hard work of sourcing fabric, providing online photo pattern instructions, cutting pattern pieces and bundling up sets for all the eager sewers.  I'm not sure just how many people she had sewing but it must be dozens, and it was a great feeling to be able to do something constructive to help the wider efforts of so many people.


I finished my last sets of tops this week and the project has come to its end - about 400 pieces will have been made in total.  Sophie and Miriam, my students, have also made scrubs, so having dipped a toe into garment construction, I am hoping that when we resume face-to-face sessions we may venture further into the area of dressmaking.


I have finished making all the blocks for my hand pieced quilt, Arlington Square: 41 full blocks, 16 half-blocks for the sides and 4 quarter blocks for the corners.  Next part of the process involves laying it all out.  As the blocks are put together on the diagonal, I am waiting till I have a bit more space to lay this one out.


My younger son had a week's leave a little while ago - he is WFH atm so not much changed for him, except that he didn't have to hide away all day in front of his computer.   He didn't feel the urge to offer to help in the garden during his week off, but I did persuade him to learn a new skill and he rotary cut the pieces for a quilt I had long planned to make for him.


Needless to say he got the hang of rotary cutting very quickly and chopped up two layer cakes in no time at all; so nice for me to just have to do the sewing.  With a careful cutting plan, we were able to squeeze the maximum number of pieces (3 1/2" squares and 2" squares) with minimal waste.  He stacked the pieces really neatly too!


The idea for the quilt started with the Wool & Needle flannels which are in navy, black and grey plaids;  because there were relatively few cream/beige neutrals in the flannel layer cake, I added in the lighter half of Jen Kingwell's Behind the Scenes Wovens.  Although different in weight, the fabrics have worked together OK.  It makes a very soft and cuddly quilt but possibly not the hardest wearing.


The pattern is by Carrie Nelson from It's a Dog's Life by Miss Rosie's Quilt Co., called 'College Man'. 
It's a variation of a double four-patch block with the design coloured so that the diagonal rows of light and dark small squares march across the quilt.  


I had fun splitting my seam allowances to flatten the middle of the blocks.  I try to do this always when making four- or nine- patches.  It takes a bit longer and I sometimes burn my fingers with the iron (!) but I do think it is worth it when I come to doing the quilting.


Because I have used a scrappy mix of fabrics the overall design does not stand out as clearly as if I had used a more limited range of fabric values in just two colours, light and dark.  But I rather like the hide-and-seek effect, and fortunately so does my son.


There were enough of the larger squares left over to make a border, and I found a stripe in my stash which provided an inner border which draws the lights and darks together.


I have finished the top and quilted it but still have to handstitch the binding, so I hope to show you the finished quilt when I next post.  Meanwhile I hope you are able to stay safe and well, and enjoy your sewing this weekend.