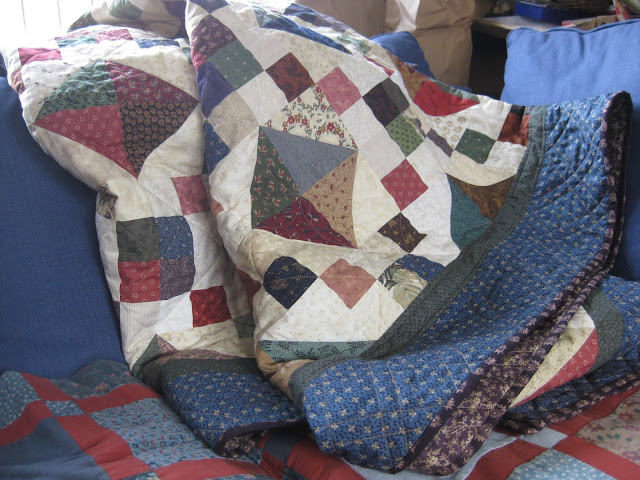
Hi everyone, hope you have had a good weekend. I managed a finish for Finish it up Friday - I stitched down the binding late Thursday night - but bad weather meant I failed to get the photos done in time for a link up.

Here it is anyway: my Thimbleberries Jewel Box quilt. I've been working on quilting it all this week, but it is yet another top which I pieced a long time ago.

I have seen the design called Buckeye Beauty in Marsha McCloskey's book Quick Classic Quilts - this may have something to do with the placement of darks, mediums and lights in that featured quilt. I don't have time to research the name properly at the moment, sorry, and mine is just scrappy anyway.

The quilt is quite large, measuring 76" x 91". There are 80 blocks set 8 x 10, plus a narrow inner border finishing at 1 1/2" and outer border finishing at 5". The blocks are 8" finished, each one is made up of two half square triangles and two four-patches.
This is a great way of using up scraps - you will need lots of 2 1/2" strips or squares, and 5" squares, so it is good for pre-cuts or leftovers from other pre-cuts projects. I have put all sorts into this quilt although it is predominantly country style colours and textures, with lots of old Thimbleberries prints from other projects.

I had such fun making these blocks and scouring my stash and scrap bags, that I find I have made enough blocks for another, equally large, quilt - so there will eventually be a pair. Slightly embarrassing, but better to use the fabric than have it sitting around forever.

The backing was from a sale many moons ago, and I was thrilled to find a moody purple Kansas Troubles fabric in my stash which works perfectly with front and back. I'm not really a purple person - I think I may have said that before - but I am coming round to its charms and the useful place it has, being not red nor blue, neither of which would have been right for binding this quilt.

I had fun with the quilting, having done cross hatching for the last few quilts and getting ever so slightly bored with it. I started out with the crosshatching here for stability, but then added the quatrefoil/fourpetal shape in the squares-on-point : this is easy to do as you can work it without turning the quilt more than three times (imagine a series of serpentine curves).

I then did straight line quilting in the inner border - another favourite - before turning my attention to the outer border. Here I felt I wanted to do a crosshatch lining up with the diagonal lines in the middle of the quilt. But the spacing wasn't quite right to be able to stitch in a way which avoided too many ends to tie in.
Then I realised that if I doubled the lines I could stitch a series of overlapping V- shapes on and off the edge of the quilt which would create the design you see here. Plus it is more interesting than just a simple crosshatch. I love a solution which comes from necessity and/or utility, plus almost no ends to tie in - what a great result!
A nice big quilt to snuggle under on the sofa! Hope you have a good week and manage to fit in a bit of stitching.


I love the border quilting on the small border and the larger border. Very nice, even a straight line quilter like me could do. Thanks for the great idea.
ReplyDelete