

This is my first attempt at a blog tutorial so please bear with me, and any helpful feedback would be much appreciated. So here goes:

I have chosen to use one of the striped fabrics for the example so that you can see clearly how the strips attached around the centre square are all of the same length, and I have used a cream thread so you can see the stitching lines.
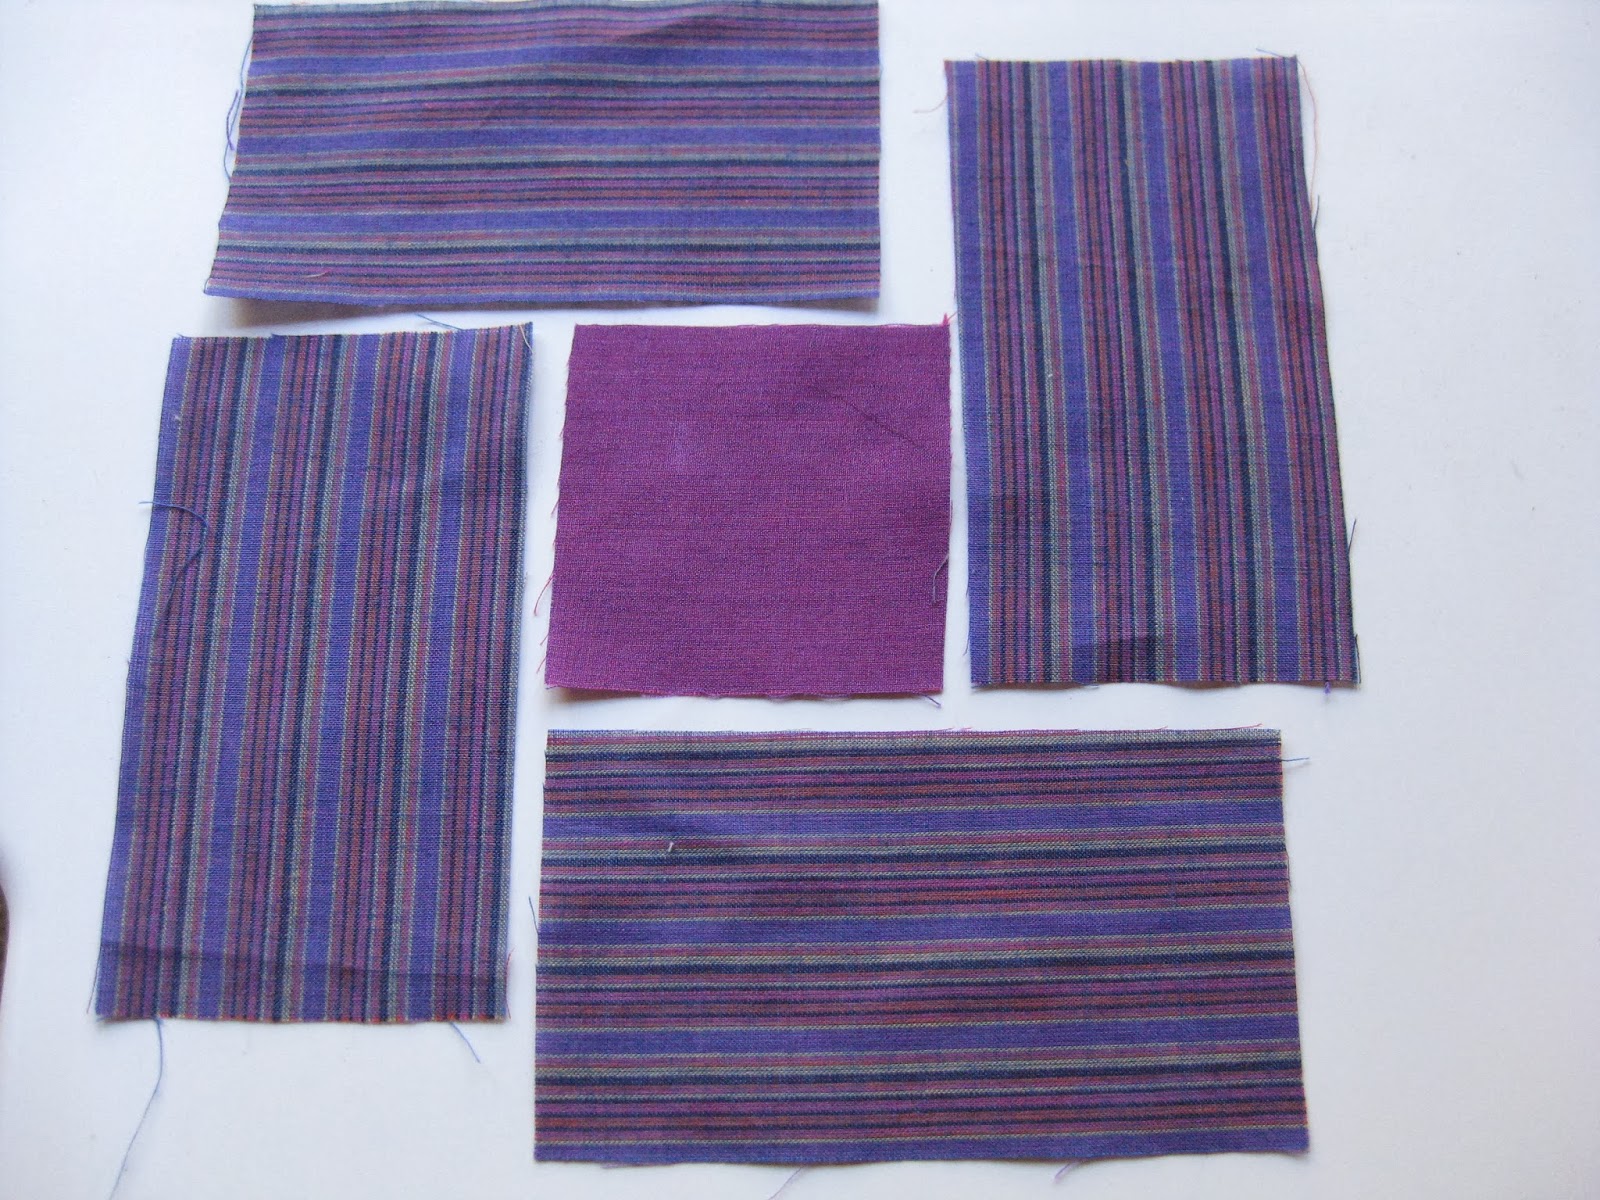
You will need one 2 1/2" square for the centre of the block and four 2 1/2" x 4 1/2" rectangles. The block will measure 6" finished (centre square and outer strips will all measure 2" finished).

Lay out the block as shown in the first photo. You now have a choice: you can work clockwise starting with the strip to the left of the centre square, or you can work anticlockwise in which case you will first pick up the strip to the right of the centre square.
Whichever you choose to do you must be consistent with all the other blocks you make as they will 'spin' in different directions (see later photos).
The following photos show the sequence of working anticlockwise: you will have the strip on top of the square as you sew. Line up the top edge of the first strip (the one to the right of the centre square) with the top edge of the centre square and stitch with a 1/4" seam from the top edge to about half way down the square (in the left hand picture I have shown the square on top so you can see where to stop stitching but you will actually stitch with the strip on top).


Finger press the seam allowance away from the centre square and lay the piece back in position on the table. Flip the top strip on top of the piece, lining up the left hand edge of the strip with the edge of the square.
Stitch from that edge along the full length of the strip. Finger press away from the centre square.


Return the piece to the table and line up the third strip so that the lower edge is in line with the edge of the square. Stitch from that edge along the full length of the strip.
Fingerpress away from the square.


Repeat for the fourth strip, lining it up with the remaining edge of the centre square (you may need to hold the partially pieced first strip out of the way) and stitch along the full length of the strip. Finger press away from the centre as before.


Finally you have to join up the partial seam.
Lay the pieced edge back against the remaining length of the very first strip, making sure it lies flat.


I do like to pin at this stage to make sure there are no little puckers when I stitch. When you have stitched the last seam, fingerpress away from the centre square and then take the block to the ironing board for a proper press.
The following pictures show the order for piecing if you want to work in a clockwise direction, starting with the strip to the left of the centre square.


You will see from this picture that the blocks 'spin' their seams in different directions. Make sure that you are consistent and always piece in the same order: no right or wrong, just a matter of preference.


If you have two matching Charm packs of 5" squares these will yield your four outer strips, so you will just need to add the centre squares from your stash. Or you can chop up a Jelly Roll or other strip roll. These little blocks are really quick to do if you use pre-cuts.

Note: I think I may have inadvertently deleted this post from its original place. I believe it was originally posted on 11th February 2014 (2/11/14) but I cannot find it except as a draft. So I have republished now.
Gosh, where have the past 6 years gone....
I've never tried partial seaming--thanks for the tutorial very clearly written hugs, Julierose
ReplyDelete