Another month gone and time to catch up again. I hope you have stayed well at this time and have managed to sew a little. Sewing has been a rare but real treat for me as I have been swamped by admin for local issues. I have valued being able to escape the computer keyboard, even if just for short periods of time, to use my hands for something other than typing.
So the two completed projects featured here are not recent fixes, but have been waiting patiently their turn in the spotlight since early July. I have done a little more sewing since then to tackle the WIPs so hope to write a follow up post before August is out. Then, who knows, September might be a new start: despite my kids being all grown up, September always feels to me like the start of the year, with summer hols behind us and a fair time before Christmas, I can really get stuck in. That's the hope anyway...
So let's get on with the roundup: first is a cushion with a foundation pieced Dachshund with a flyaway felt ear (lovely to stroke, just as one absent-mindedly would stroke a real dog's ear when he is snuggled by you on the sofa...(apologies to all cat lovers out there, just substitute you favourite animal in the mental picture of comfort and relaxation).
I cannot claim any credit for the pattern which was designed bu Jo Carter and featured in Love Patchwork & Quilting Issue 52 (a while ago now, sorry). I put the magazine aside as I wanted to work on a project with my young friends which was a more complex foundation pattern than the Circle of Flying Geese they made a while ago [stop press: I have finally finished mine and and made the tops into cushions, to be posted next time]..
Needless to say, having pulled the fabric from my stash, it sat around for some time. Lockdown made me get on with it. I am not the greatest fan of foundation piecing but it definitely has its uses in this sort of project. The design was actually for a pair of dogs on a wallhanging, but I thought one dog would be just right the right size for a cushion.
I finished the cushion back with a concealed zip, using this excellent tutorial by Sotak Handmade. I even made the cushion pad, as the cushion is an unusual size: 12" x 18 1/2". I recommend using featherproof ticking, not ordinary calico which is a looser weave, if you are going to make your own cushion pads; french seams will also help ensure the feathers are less likely to escape over time. The feathers came from an old feather duvet. It is a messy job filling the cushion pad, but very satisfying to have made it from what I had in the house and to find a new use for the duvet's contents. Done!
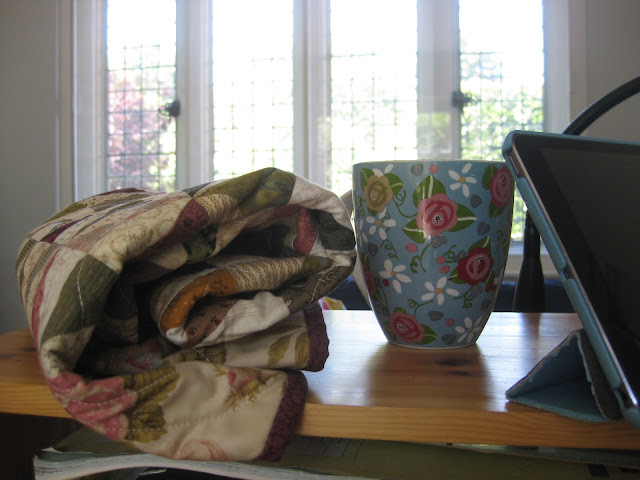
My second finish is this small green floral quilt, made with mostly Japanese fabrics by Lecien. I am ashamed to say that the completed top has been waiting almost twenty years to be quilted. The folded backing had slightly faded, but hopefully only I will notice.
I bought all the fabrics many years ago when I worked in my LQS and lush Japanese floral fabrics were first becoming available in the UK. The pattern is a simple one to make, composed of strips and squares, but in a blended, blurred style with the lovely fabrics doing most of the work: I was inspired by the book, Blended Quilts by Marsha McCloskey and Sharon Yenter which came out in 2002 which is full of glorious quilts using marvellous complex florals and reproduction fabrics.
The top didn't take long to make: why then so long to complete the quilt? The sticking pint, as so often the case for me, was how to quilt it. I had this great plan to hand quilt Amish Waves/Baptist Fans all over, but my handquilting isn't great and so I kept putting it off. During lockdown I dug out a huge pile of unquilted tops, and have has to recognise that I will never be able to complete them if I go down the handquilting route.
Finished is always better than perfect, so my aim over the remainder of this year is to tackle and finish all completed quilt tops for which I already have backing fabrics set aside. This top, being fairly small, was the prime candidate, so I layered it up and pondered the quilting: the large squares lend themselves to a curving design, so I went with a favourite quatrefoil leaf shape which is easy to fit to the size of the square. You will see that I made a template out of template plastic and marked the design with a Hera marker, the lines showing up clearly on this fabric.
The complementary strip squares I quilted with diagonals, but I felt I didn't want a regular cross-hatch. The elongated diagonal crosses seem more elegant and in keeping with the spirit of the quilt. There were a reasonable number of ends to tie in with this quilting pattern, but it was worth it and I am very pleased with the result.
Here's the back to show the quilting. You can just see the fading where the backing had been folded, but it sort of looks vintage, or so I tell myself. Lesson to self about not keeping fabrics where the sun might get at them...and maybe using stash a bit quicker?
The quilt measures 45" x 58". The large squares measure 6" finished (cut 6 1/2") and the strips 11/2" finished (cut 2"). There are half blocks around the edges and a 4 1/2" (finished size) border of the feature fabric, the green floral, to frame the quilt and link with the large squares.
These photos were taken in July before the fierce sunshine we have had recently, so the garden is looking quite green still. The metallic blue of the globe thistles in the foreground of the photos below bring out the grey-blue tones in the quilt (serendipity as I didn't plan it like that). I am not a fan of green quilts usually, but I do love this one: with such a soft palette it is easy on the eye.
No time to sit and relax in the sunshine - on with the next projects, there are plenty to choose from! Hope you have some time for sewing - or sitting in the sun, as takes your fancy!


