Thursday, 23 August 2018

Back in the (sewing) saddle again


[Not my quilt! - read on]

After an interlude far too long to dwell on, I am finally back sewing and blogging.  A variety of tasks and activities have kept me away from my machine, some pleasant, some less so, but it feels  good to have spent a few days at last with fabric, needle and thread and I wanted to share what I have been doing: HAND PIECING!!!

Yes, I know - you can't chain piece by hand, but months ago I had booked two workshops by Karen Styles of Somerset Patchwork which were held at Cowslip Workshops last week.  Having enjoyed Karen's classes last August (and despite having made no progress at all on the quilts I started then...) I signed up and arranged our family holiday in North Cornwall to fit the dates...


Here is the view from Cowslip across the valley to Launceston Castle.  As you can see, our glorious and uncharacteristically hot summer has ended (we were 75 days without rain in Surrey) and the weather was much more typical of a usual August.  I love this scene, whatever the weather, and we were happily sewing so who cares if the sun is shining...


We stayed in a remote 17th century National Trust cottage down a very steep track in the Valency Valley, near Boscastle.  It was so quiet and peaceful, no WiFi or mobile phone signal, perfect for recharging human batteries.  For literary fans, I walked the dog up the valley to St Juliot Church where Thomas Hardy met and courted his first wife, Emma Gifford.


The quilt at the top of this page, Robin's Nest, is the one I was particularly attracted to making as it seemed to me there was quite a lot I could machine piece.  I do like intricate traditional quilts but I have to be realistic about how much time I have (not a lot recently, alas) so my sewing machine is always the tool of choice.


Here are a couple of closeups of Karen's beautiful quilt to show some of the elements:


and here is what I managed to make in the course of the day:


It may not look like much but I was quite pleased as it isn't always easy to achieve a lot in a class situation where there is a lot going on (not just chat!) and new ideas to absorb. 

I machine pieced the small red stars (3" finished) and set them into a ring with 60 degree triangles.  I handpieced the triangles to the stars which didn't take long: Karen advised it is easier to manage the angles by hand, especially with relatively small pieces, and had lots of tips for handpiecing which made it really straightforward and accurate.

I have since made twelve small blue stars which I will piece into the outer ring with brown triangles and then set the two rings together.  I also cut lots of diamonds for the diamond border and the outermost six-pointed star border and I glue basted some of the leftover scraps on to half inch hexagon papers.  These are pretty small but so cute!


I hand pieced the stars: Karen showed us how to spin/fan the seam allowances for flat centres and how to stitch so as to ensure there are no little holes in the middle where the diamonds meet.


So I am starting to get some of the elements together; maybe it is not such a daunting prospect after all?  Watch this space...

But I am also hoping (what an optimist!) to work on another Karen Styles quilt: Circle of Sisters:


This was the second class I attended and it complemented the first day perfectly as we worked on hand piecing six-pointed stars which of course form the outer border of the Robin's Nest quilt.

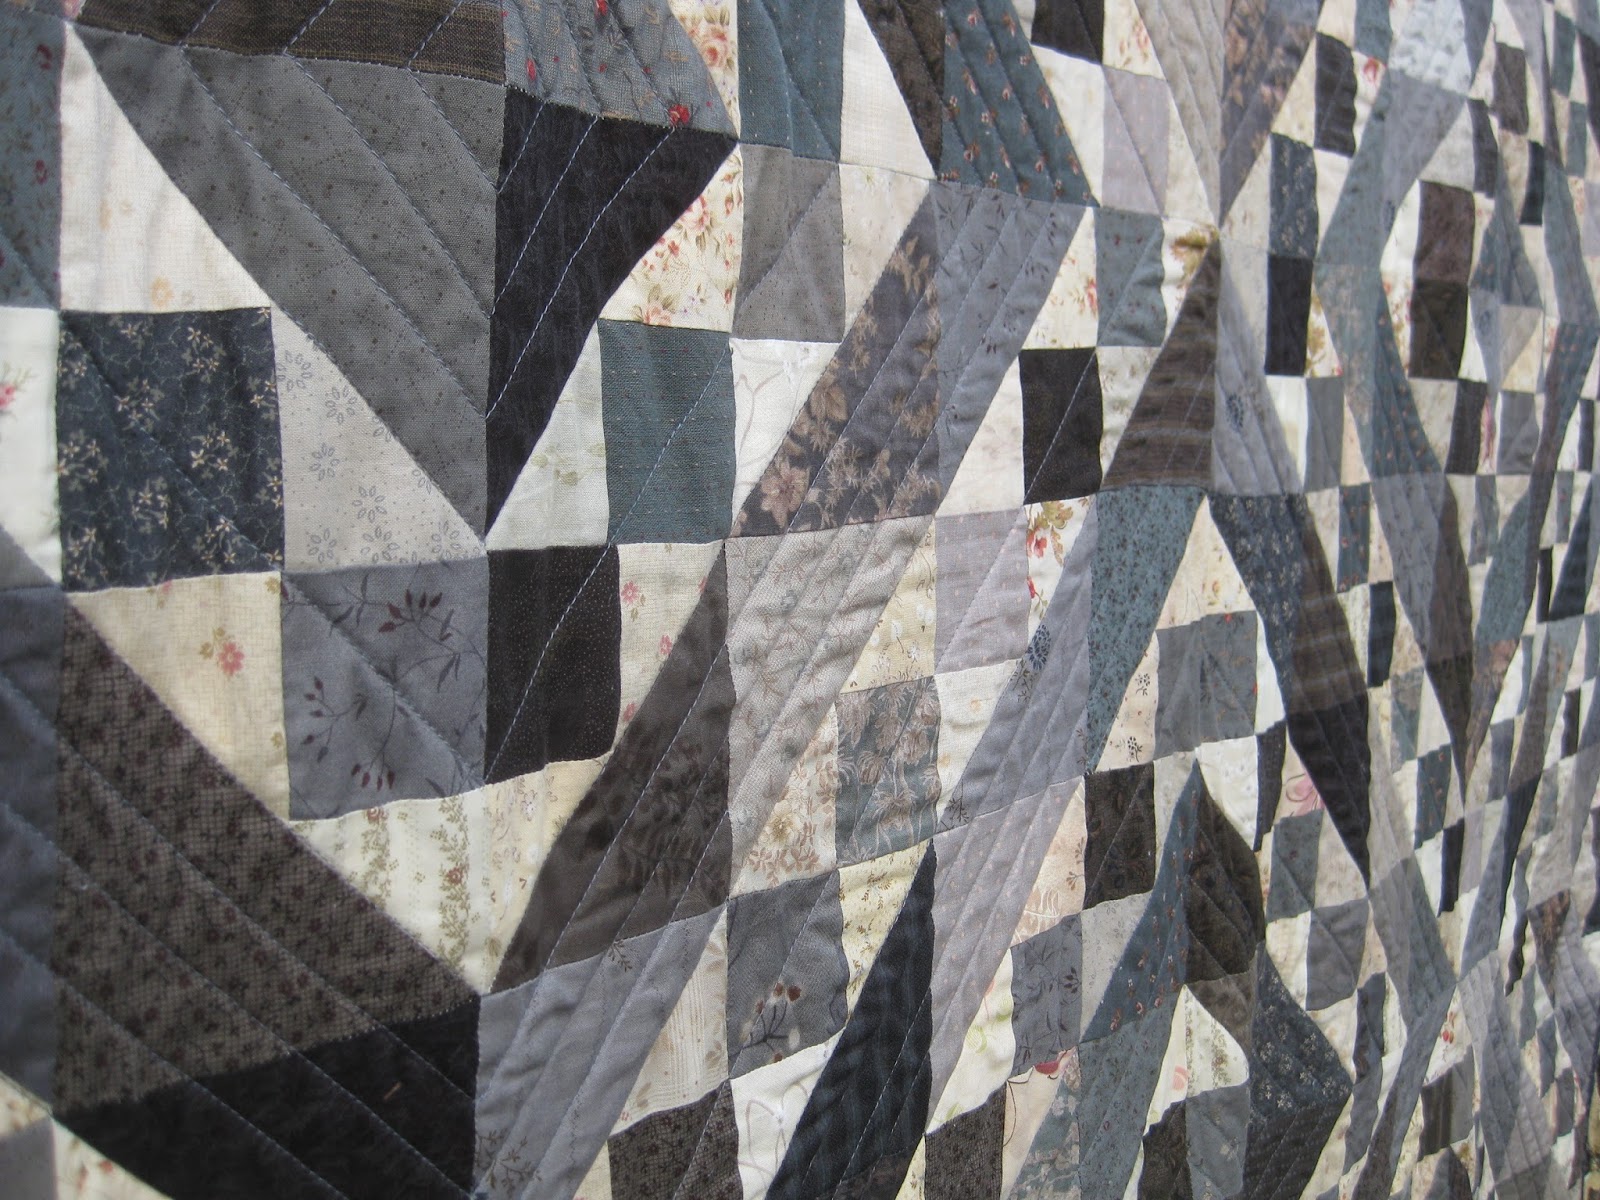
Here are closeups of some of Karen's fabulous blocks which I think are about 16" across:


The quilt is based on an original which Karen owns, and there is plenty of scope to play with the placement of fabrics to create different effects. 

Here is what I managed to do on the day:


I really enjoyed the handpiecing and have done some more in the past couple of days.  The surprise is, when you are all set up and have done the preparation (which admittedly isn't the most exciting part), the actual sewing isn't all that slow.  However there are 1600 pieces in this quilt, so it may still take a while...

I am also be inspired to make some smaller six pointed stars as Karen's little ones are so delicious, and the occasional use of fussy cutting makes them even more adorable:


and to try the 365 tiny blocks in the Star a Day quilt:


Also on my 'one day' list is the fabulous Mrs Billings quilt which Karen has assured me I CAN machine piece (apart from the hexagons):


So here is the amazing lady who has made all these quilts, and whose excellent teaching, pattern writing and the provision of precise templates have made the designs accessible to and possible for the rest of us.  Thank you, Karen, for a terrific two days of classes.


I won't be changing the name of this blog any time soon but I will be making time for some handpiecing as well.   Enjoy your sewing this weekend!

Friday, 23 March 2018

Bunting bonanza


Hello!  Here is a fabulous Friday finish from my students, Miriam and Sophie.  They have worked so hard over the past few months transforming a big bag of fabric squares which were no longer wanted and giving them new life as rainbow bunting.

The technique we used was the same as for my Vintage Bunting (tutorial in this post, there are a few unrelated quilt pics first so scroll down).


We worked out the best size for the pennants based on the amount of fabric available in each piece and the dimensions of the roll of Bondaweb (now called Vliesolinefix, I believe, but it will always be Bondaweb to me).  Even though the fabric pieces were free, I wanted to maximise the amount we were able to use.

The squares varied a little in size but most could be folded in half to give four double sided pennants, each measuring 7" across the base (top) of the triangle by 11" long.  We found that four pennants set 'head to tail' fitted perfectly across the folded fabric square and across the 18" width of a roll of Bondaweb.

(We made our pennant template from a sheet of A4 paper and just fiddled about until it fitted the fabric and looked a nice shape - you can make your pennant any shape or size you wish.  Once you are happy with it, though, it is worth making a plastic template as this is much more robust to draw round than paper or cardboard).

So decisions made, the girls set to work and we set up a production line for all the processes.  First task, to slice the roll of Bondaweb into 11" pieces (the roll is 18" wide) and for this we used a rotary cutter and ruler for speed and accuracy.

Then the fabric squares were pressed in half and the iron applied until the Bondaweb adhered to one half.  When the paper had cooled and the glue set, the backing paper was peeled off and the top half of the fabric square flipped down and pressed to stick.  Hey presto, a bonded double sided sheet of fabric, which could then be marked with the shape of the pennants and cut out.

We found that the easiest way to cut out the pennants was to mark the four triangle shapes on the fabric (arranged head to tail again) using the plastic template and either a pencil or chalk marker, and then to cut out with rotary cutter and ruler.  This meant we had really accurate sharp edges to our pennants.  I would not recommend you to use the template to cut against as it is not a safe method.


So each piece of fabric yielded four double sided pennants which then had to be zigzagged round the two long edges (not the base/top of the triangle as this will be covered by the tape).  I think this was the task the girls liked least, but they became very good at it, including navigating round the narrow tip!  I turned out my threads box to find colours which more or less matched the various shades across the rainbow.


Finally the preparation was done and the fun part could begin: Miriam and Sophie had glued, cut and stitched 288 pennants in total, four each of 72 different fabrics.  They were keen to use a rainbow layout so they first arranged the pennants in bundles of four in graduating colour order.


Next the question of how many pennants to put in each string?  After much deliberation and a bit of maths, it was decided to divide the pennants in to three different colour sets which would give 24 pennants per string, and there would be four strings of each colour set.


Once the decisions had been made, the pennants were sorted into their sets and the girls stitched them to the heading tape.  Finally the task was complete!  We didn't keep a note of how much time it took, and we have made other small projects in between, over the past three or four months, to keep from getting bored.  Definitely worth it, though, I hope you will agree.


So twelve strings in all, each one a rainbow but subtle differences known only to the makers.  Each string with 24 pennants measures about 4 1/2 metres in length.  We used a total of 20.3 metres of bondaweb and 56.4 metres of tape.  And we have about 54 metres of bunting in total - sufficient for most parties and the village fete!


All ready for the summer's events.  There's nothing like a string of bunting to make us feel like we're having fun.  And whilst this isn't exactly a free project (the Bondaweb and tape had to be purchased) the bunting is durable and should give many years of service.


Well done to the bunting makers: another skill to add to the CV.  Linking to Finish it up Friday at Crazy Mom Quilts.  Hope you have a happy and productive weekend, whatever you are working on.


Monday, 19 March 2018

Thimbleberries Jewel Box II - a February finish


Too late for Finish it up Friday, my usual linkup, but I did have a finish in February which I thought I should show you now, before I get distracted by something else!

I mentioned that I was very good in January about focusing exclusively on quilting: this virtuous resolution carried over into February in that I layered several more tops in readiness, but I only actually managed to quilt one of them.  My excuse is that we had the plumber in, refurbishing our bathroom, which is a different sort of finish for which I cannot take credit.


Yes, it may look familiar to readers of this blog: I made another Jewel Box quilt from old Thimbleberries collections - probably 15-20 years old - and blogged about that one here.  Amazed to see it is almost exactly a year ago.  How serendipitous: I couldn't have told you if you had asked me when it was, so it's great to have this blog as a record.

As I said in the previous post, I had quite a few blocks left over, as one inevitably does, and once again I trawled through all my tucked away stash fabrics, chopping up anything which looked as though it might fit in with the country palette into 5" or 2 1/2" squares.  


This is a great scrapbuster quilt and there are lots of favourite old fabrics so for me it's something of a walk down memory lane.  It's also a great one for clearing out odds and ends of neutrals from other projects as variation in the neutrals adds interest.  As ever with a scrap quilt, the more different fabrics the better, as it is surprisingly hard to get a layout which doesn't repeat the same fabric in too close proximity.  Laying out the blocks satisfactorily always seems to take longer than actually stitching them together!


Don't you think the old patterns are sometimes the best?  Quilts like this one are really easy to live with; undemanding and comfortable, they just fit in with family life.  No-one minds if something gets spilled on them or they drag on the floor.  I guess that's why I keep coming back to this palette of colour and traditional blocks, even though I love the bright fabrics and modern aesthetic too.


At some point during 2017 I must have put the blocks together, and then had a pause till I found a suitable backing fabric in the Cowslip Workshops sale last summer.  I love this backing: it is from Moda's Collection for a Cause 'Nurture' line, and it has just the right country look.  Also the colour was perfect as it gives the quilt a warm and cosy  feeling.  So good to get the perfect fabric at a discount - who doesn't love a bargain without the need to compromise on artistic standards?!


I found enough of an old red Thimbleberries fabric (a useful favourite, also used in other quilts) for the binding.  Job done!  I do love shopping my stash and feeling thrifty: the fact that at some time I had to buy all of the fabric to be able to have a stash to shop is beside the point....


The quilting I did the same as for the first version: crosshatching through the diagonals and then a curving quatrefoil shape in the diamonds.  Easy to do with a walking foot and not too many ends to tie in, especially as this large quilt didn't need a border.


Quilt stats: 80" x 88".  One hundred and ten 8" blocks set 10 x 11.  The blocks are each made up of two 4" HSTs and two 4" four-patches (all measurements are for finished sizes).  I think I have now used up all my made blocks with this quilt, though the few fabric leftovers have gone into the makings of another scrappy quilt which still has some way to go...  Carry on quilting!

Sunday, 11 March 2018

Update on January - before March is over!

Warning: picture heavy post!


Hi there!  I have been a bit preoccupied with various things recently and realise that I haven't posted about a couple of quilts I finished in January.  As February March races away (thank goodness: we have just had snow and very cold temperatures, for the UK), I thought I should record the rest of January's work.

I went a bit mad in January to be honest, as the weather was mostly miserable, and I know that there will be a ton of stuff to do in the garden which will take priority in March/April.  I didn't let myself do any piecing at all but layered several quilts and concentrated just on the quilting.


As it is such a major effort to clear the dining room table to lay out quilt tops, I have found that layering  several quilts at a time works well.  It is not my favourite part of quiltmaking as it always seems as though one is spending a lot of time not actually sewing, after allowing for all the measuring, joining the backing, pressing, de-threading, and finally, layering, plus I often mark any straight quilting lines at this stage with a Hera marker.

End result was that I managed to complete four quilts in January, two already blogged and the two I am showing you now.  I also did most of the quilting on another quilt but have got stuck on how to quilt a couple of areas - till inspiration strikes that one is still a UFO.


It may sound good but I am ashamed at how long these quilt tops have been lying around in the UFO pile.  I did manage to buy the backing fabric in the summer when I was at Cowslip Workshops.  The gray taupe cost an arm and a leg as woven taupes always do, but it is gorgeous and I did want it.  However I offset the cost by managing to get the backing for the Disappearing Hourglass in their sale!

So first up is the Gray Taupe:


I made most of the blocks for this quilt when I did a class several years ago with the lovely Jo Colwill at Cowslip, my favourite place to visit in the South West. In the past I always managed to wangle a visit if we were holidaying in Cornwall when the kids were small; this year we will be holidaying in Cornwall (without the kids) just so I can do a couple more workshops there!


Anyway, as so often happens the blocks lay there while I tried to decide on a layout (and got distracted by other projects and life in general). I put them together eventually and then didn't get any further for want of a backing fabric. Turning out cupboards caused the top to reappear and I took it with me to Cornwall in the summer and bought the backing. A few more months on and it is finally finished - hooray!


The quilting didn't take all that long once I got down to it. I knew I wanted to do concentric parallel lines with the walking foot and it's not too big a quilt to wrestle through the machine.


This quilt measures 64"x 82" and came about because I had accumulated an awful lot of taupe fat quarters over the years when I worked in a quilt shop.  I have used many of the medium tones in other projects, and was left with the lights and with darks in the blue/grey palette. I therefore chose a block pattern and setting which would make the most of the contrast in value.


The individual blocks measure 4" finished and there 320 blocks (gosh, that sounds a lot!) which are set 16 x 20. The block is made up of a dark large triangle, a dark square and two small light triangles. The block is called 'Review' in Marsha McCloskey's book Block Party, but I think it may also go by the name of Grandmother's Choice or something similar.  As so often in quilting, old blocks accumulate many names.


Yes, thanks to the power of the internet, I have just done a quick search and found lots of images for Grandmother's Choice.  Like Log Cabin, it is a half and half block in design terms - half dark, half light, so can be arranged in many different ways.


Now for something which I thought was completely different but actually I see definite similarities: here is another quilt which relies on good contrast for its design to read clearly, and although scrappy it is essentially a monochrome quilt.  Well, they make quite good partners for this post, don't they?


This is my version of the Disappearing Hourglass quilt for which you can get a tutorial from Missouri Star Quilts online.  I made a floral version back in 2015: you can see those posts here and here (second half of post contains my tips for making the blocks).


As I said in the earlier post, I don't like the method for making half square triangles which that tutorial uses as it results in bias edges on the outside of all the HSTs.  With a technique which involves cutting and restitching as this does, it seems to me to be asking for trouble, and I would recommend that you make your HSTs by conventional methods which keep the bias seam on the diagonal and safely stitched into the block.


It seems I was making the blocks for this little quilt back in October 2016 (here) so not quite as old a WIP as many of my projects...


This quilt measures 49" x 57" and there are 56 seven inch blocks set 7 x 8.  As with the floral version, I first of all ditch quilted the blocks with a walking foot, but as much as possible I wanted to avoid the seam allowances and bumpy intersections.  Using the points of the stars as a guide, the additional straight lines frame the stars and create an irregular grid across the surface.


The backing fabric I absolutely love: I have lost the selvage but I think it was part of a Di Ford collection, and it has that quirky 19th century look about it.  The colours were a perfect match for the FQ collection I used for the blocks, bought quite a while ago from Patchwork Cabin, my LQS which specialises in reproduction fabrics.  It was by Barbara Brackman for Moda but I can't remember what the fabric line was called.  The only selvage I have is for a blue equivalent to the red fabric in the photo above; it's labelled 'Cornshuck Hat 1850-1874' which I include for curiosity value!


The binding was made from the offcuts of a backing for another quilt (shown here): so satisfying when that happens.  I had almost enough, and used a scrap of one of the FQs left to fill the gap.


Right, enough photos - time for more sewing: there are still plenty of UFOs requiring attention!  Linking today (very belatedly) to Finish it up Friday at Crazy Mom Quilts (go and look at the beautiful Log Cabin top), though I did write this post on Friday: I just forgot to post it!  Hope you have had a productive and enjoyable weekend.