Hello again!
I guess many of you will have made traditional Log Cabin blocks before. I am posting this tutorial really just to remind you not to overlook the pleasures of this old design. It is a real scrap buster and I was impelled to make it as I looked at the many overflowing boxes of fabric in my sewing room.

Surely this counts as Spring cleaning? My husband remained unconvinced as he watched me bent over my sewing machine several days in a row and many other tasks untouched.... Sewing is so much more enjoyable than house cleaning.

For me, a block like Log Cabin has all the benefit of a simple design which doesn't require too much thought once the cutting has been done: soothing repetitive chain piecing at the machine and mass production of small blocks, with regular forays to the ironing board to press. You don't need a design wall or space to lay out at this stage, another advantage if your house is fuller than usual, as mine is.

If you are stuck at home and unable to visit your local quilt shop, maybe you could look in your stash and see what treasured leftovers are tucked away, waiting to be made into just this quilt?
The fruits of my labours are 250 small (5 1/4" finished) blocks which I will be able to sew into a quilt in due course. And lots of scraps no longer jumbled together without a future plan. My brain feels clearer and I had such a great sewing workout. Now I can turn my attention to other things, including posting this tutorial.
Here goes:
Fabric selection
OK, so the starting point for this project was a box of red and gold fabrics which had been sitting in my sewing room for quite a while. You can choose any colours, even a mixture, provided that you differentiate between the light side of the block and the medium/dark side. Contrast is important in this block: remember the value of value!

You will see how important towards the end of this post when I show you possible layouts for the blocks - or search on Pinterest for Log Cabin quilts: then are lots of examples out there, in traditional colours and layouts, and modern interpretations. I hope you will be inspired!
Cutting
In my box there were quite a few 2 1/2 inch red strips and 2 1/2 inch gold/cream strips left over from another quilt plus odds and ends of fat quarters from other projects. Wanting to make use of these 2 1/2" strips and minimise waste determined the width of the strips I would use for the block: I cut all the 2 1/2" strips in half lengthwise to give long 1 1/4" strips. I then cross cut the resulting 1 1/4" strips into the required lengths, which are as follows:
Red centre square: 1 1/4" square (I used the same fabric for all the centres for consistency)
Gold strips: 1 1/4" x 1 1/4"
1 1/4" x 2"
1 1/4" x 2 3/4"
1 1/4" x 3 1/2"
1 1/4" x 4 1/4"
1 1/4" x 5"
Red strips 1 1/4" x 2"
1 1/4" x 2 3/4"
1 1/4" x 3 1/2"
1 1/4" x 4 1/4"
1 1/4" x 5"
1 1/4" x 5 3/4"

When I had finished cutting a selection of strips from several fabrics in all the sizes, I found it helped to lay these out on a tray (or the box lid, in my case). The red centre square is in the bottom right corner of the photo. See Note below if you want to make your blocks a different size.
Just a small point about cutting: I like to cut a lot of strips at once so that when I am sitting at the sewing machine I have lots of choice about what to put where in each block. This keeps me from becoming bored and helps to ensure plenty of variety in each block (which is an advantage later on, so you don't get the same fabrics appearing next to each other).
If you are using my measurements, you will find that you can cut all six sizes of gold pieces from a folded width of fabric strip, but you cannot quite do this with the red strips (you can get all sizes except the smallest, 2" strip). If you layer up your 1 1/4" long strips (assuming you are working with yardage/WOF strips) you will be able to cut a selection of strips quite quickly. I always keep a note of the strop sizes beside my cutting mat - it is really easy to get muddled with so many sizes.

If you have odd scraps to be chopped up (and I hope you will raid your scraps basket) it may take slightly longer to cut enough strips to start using, but it will introduce variety and clear your scraps in a way that is so satisfying.
Don't feel you have to cut up all your fabric in one go, however: if you come back every so often and cut another batch of strips from a different selection of fabrics, and mix these in with what you have left after making some blocks, it helps to keep the variety of fabrics between the various blocks, so not every block has the same combination of six light and six dark fabrics.
Note:
You can of course make a Log Cabin block with whatever width strips you like. If you choose a different width strip to me this will affect the length of the strips because you will be building a bigger (or smaller) block. Remember, the width of the strip will dictate the size of the centre square and the overall size of the block.
If, for example, you want to work with 2 1/2" strips, you will start with a 2 1/2" centre square (which will finish 2" square) and all your logs will be 2" wide finished, but cut from 2 1/2" strips and the lengths will vary. The finished size of a block using these measurements will be 14 inches square. There is a whole range of possible sizes in between for you to choose from.
You will need to work out the length of strips to cut and I find that the easiest way to do this is to draw the block out on graph paper the actual finished size, colour the sketch light/dark then write out the finished size of the strips, remembering to add half an inch to the width and length of each strip and also the centre square to allow for the seam allowances.
Sewing the block
Start by laying out your pieces for the first block. Where you place your pieces determines whether the logs are added clockwise or anti-clockwise. Mine spin anti-clockwise but either direction is fine - you just need to be careful that you stay constant to your initial choice. This is why it is a good idea to make a single block from start to finish, to check your stitching and to use as a pattern/reminder for all following blocks.
You will see that the Logs are added in order of size and in colour pairs. First the two smallest gold pieces, then the two smallest red pieces. This makes one complete round of the centre. There are three sets of rounds for this size block. You can choose a different number of rounds if you prefer for your design.
Stitch the centre square to the smallest gold piece - also a square, with a 1/4" seam allowance, and press the seam allowance towards the gold square.
This will be the process throughout: the seam allowances are always pressed towards the log and away from the centre square to distribute bulk evenly.
Continue to add logs to the centre: next is the second smallest gold log which measures 2".
Because the logs are cut the exact length required, it is easy to see if the seam allowance is deviating from an accurate 1/4". It also helps to keep the unit square and true.
Now the smallest of the red logs, also 2" in length, is added.

And the first round is completed with the addition of the next size red log, which is 2 3/4" long. The unit now measures 2 3/4" square.
The next log to add is the gold log which is 2 3/4" long,
followed by the gold log, 3 1/2" long:
Now the next pair of red logs, first the red piece measuring 3 1/2" long (apologies, I noticed the piece shown in the photo above in fact was slightly too long and I trimmed it to size before adding it),
then the log measuring 4 1/4" long, thus completing the second round. The unit measures 4 1/4" square at this stage.
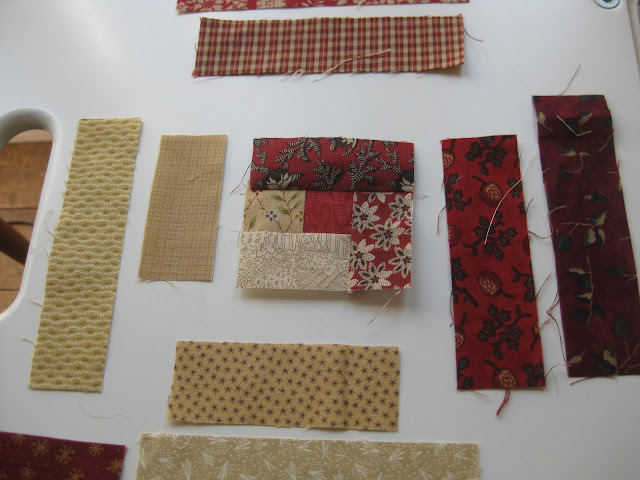
On to the final round:
Add the gold piece measuring 4 1/4",
then the last gold log, measuring 5" long.
The penultimate red log, also measuring 5",
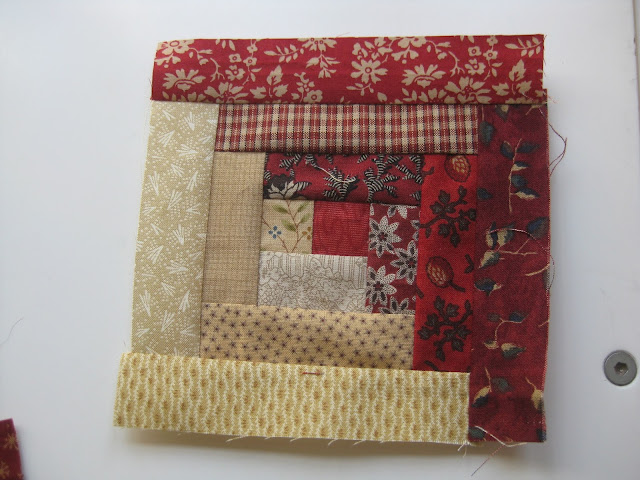
and then the last red log, which is 5 3/4" long, completes the third and final round.
Here is the finished block, measuring 5 3/4" unfinished (it will be 5 1/4" when stitched together in the quilt). It has stayed fairly square and true throughout the piecing process, because the logs were cut to size at the outset. Any sewing wobbles/inconsistent seam allowances can then easily be corrected as one goes along. This accuracy will pay off when all the blocks come to be sewn together.
Now, taking that first block as your pattern for all the others, make a whole heap more of the same!!! Set yourself up for mass production, embrace your inner chain piecer, find something good to listen to, and away you go! You will be cursing the need to refill your bobbin before you know it (is there ever a good time for the bobbin to run out?).
Possible block layouts
There are a wide variety of layouts for blocks which are essentially divided diagonally into light/dark. You may have seen many of these made with HSTs, but any HST layout could be made with Log Cabin blocks or other diagonally divided traditional block.
Here I have laid out just a few blocks to give you an idea of some of the most common layouts for Log Cabin. Many of the older layouts have traditional names: the top layout is called Straight Furrows and the bottom two pictures are Streak of Lightning.
I am not sure at this stage which layout I will go with. For now, it is enough to have had the fun of making the blocks. Do let me know if you decide to make a Lockdown Log Cabin too.


No comments:
Post a Comment